
Dungeon Studios Pinball Machine
Custom HomeBrew PinBall Machine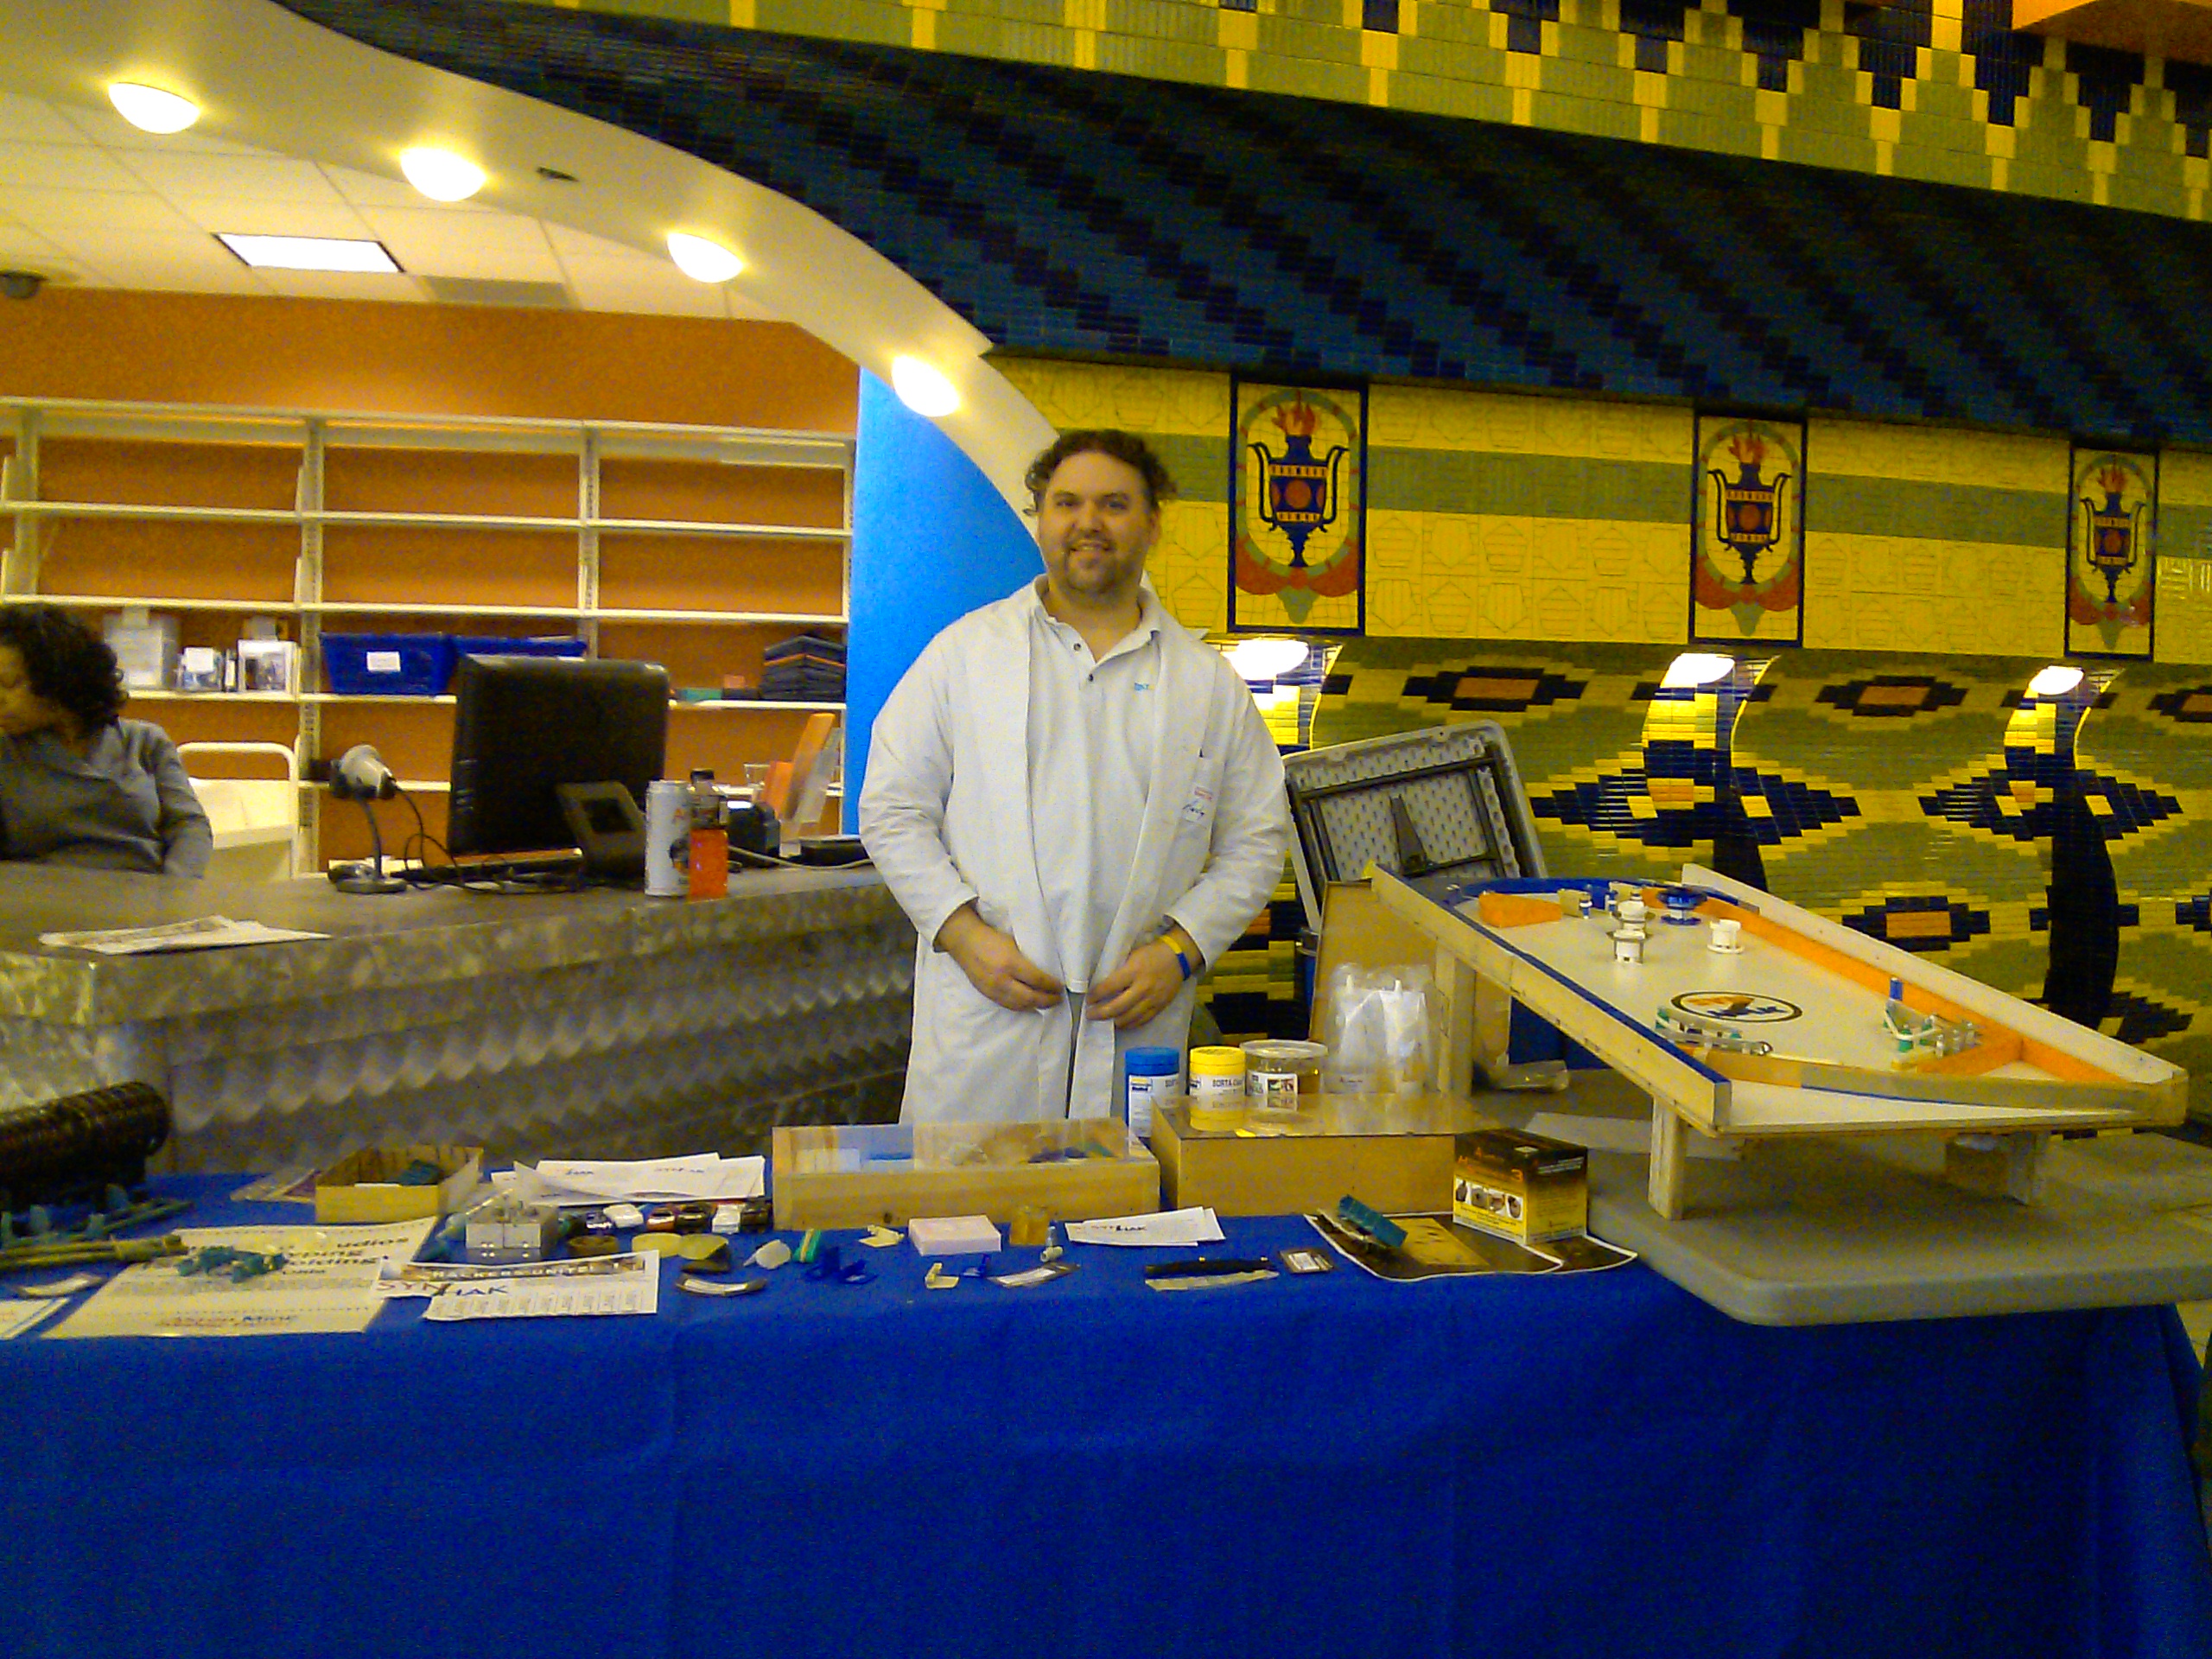
|
|
|
This pinball machine started out with me just designing and building the custom pop bumpers, I wanted to build this complex machining with tons of pop bumpers but since the cost of building a custom machine is way out of our reach I couldn't see this happening. I figured that I can make and sell the custom pop bumpers to finance the build of a pin ball machine. To get started, I needed to see just how a normal pop bumper is built, So I bought one and mounted it to a small piece of wood. Now I can figure out what parts I can reuse and what parts I we will have to make from scratch. |
|
|
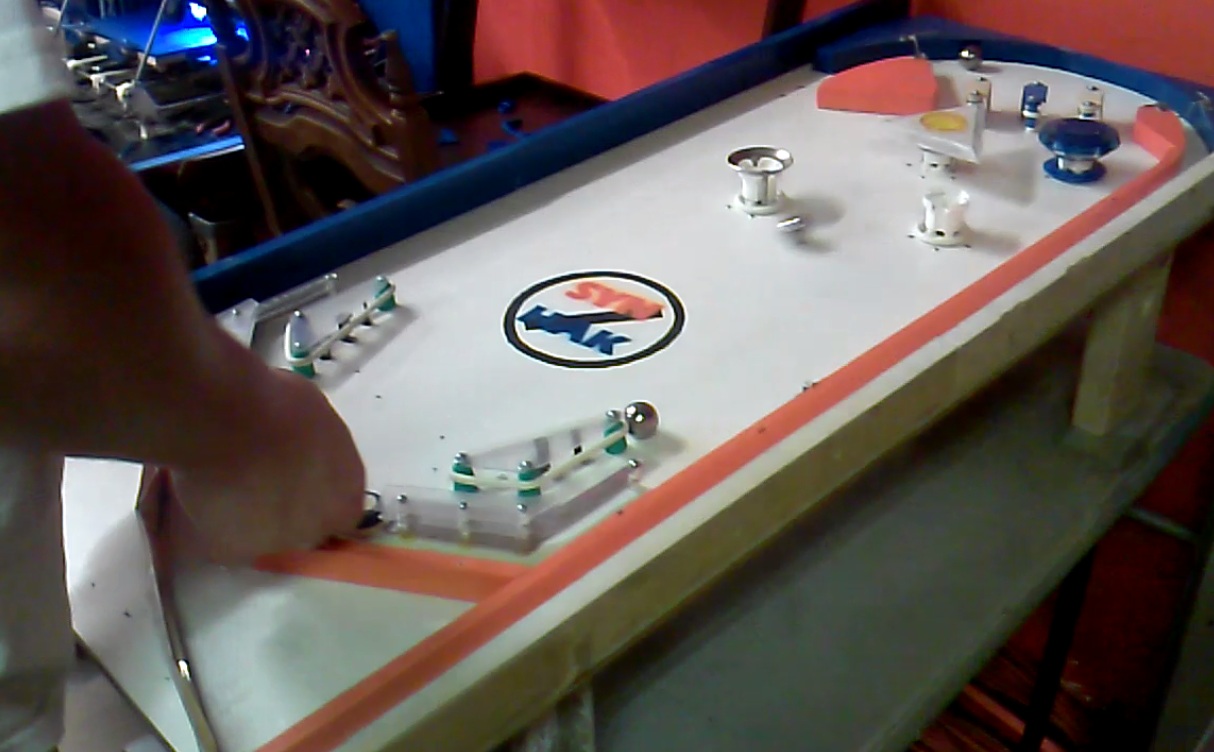
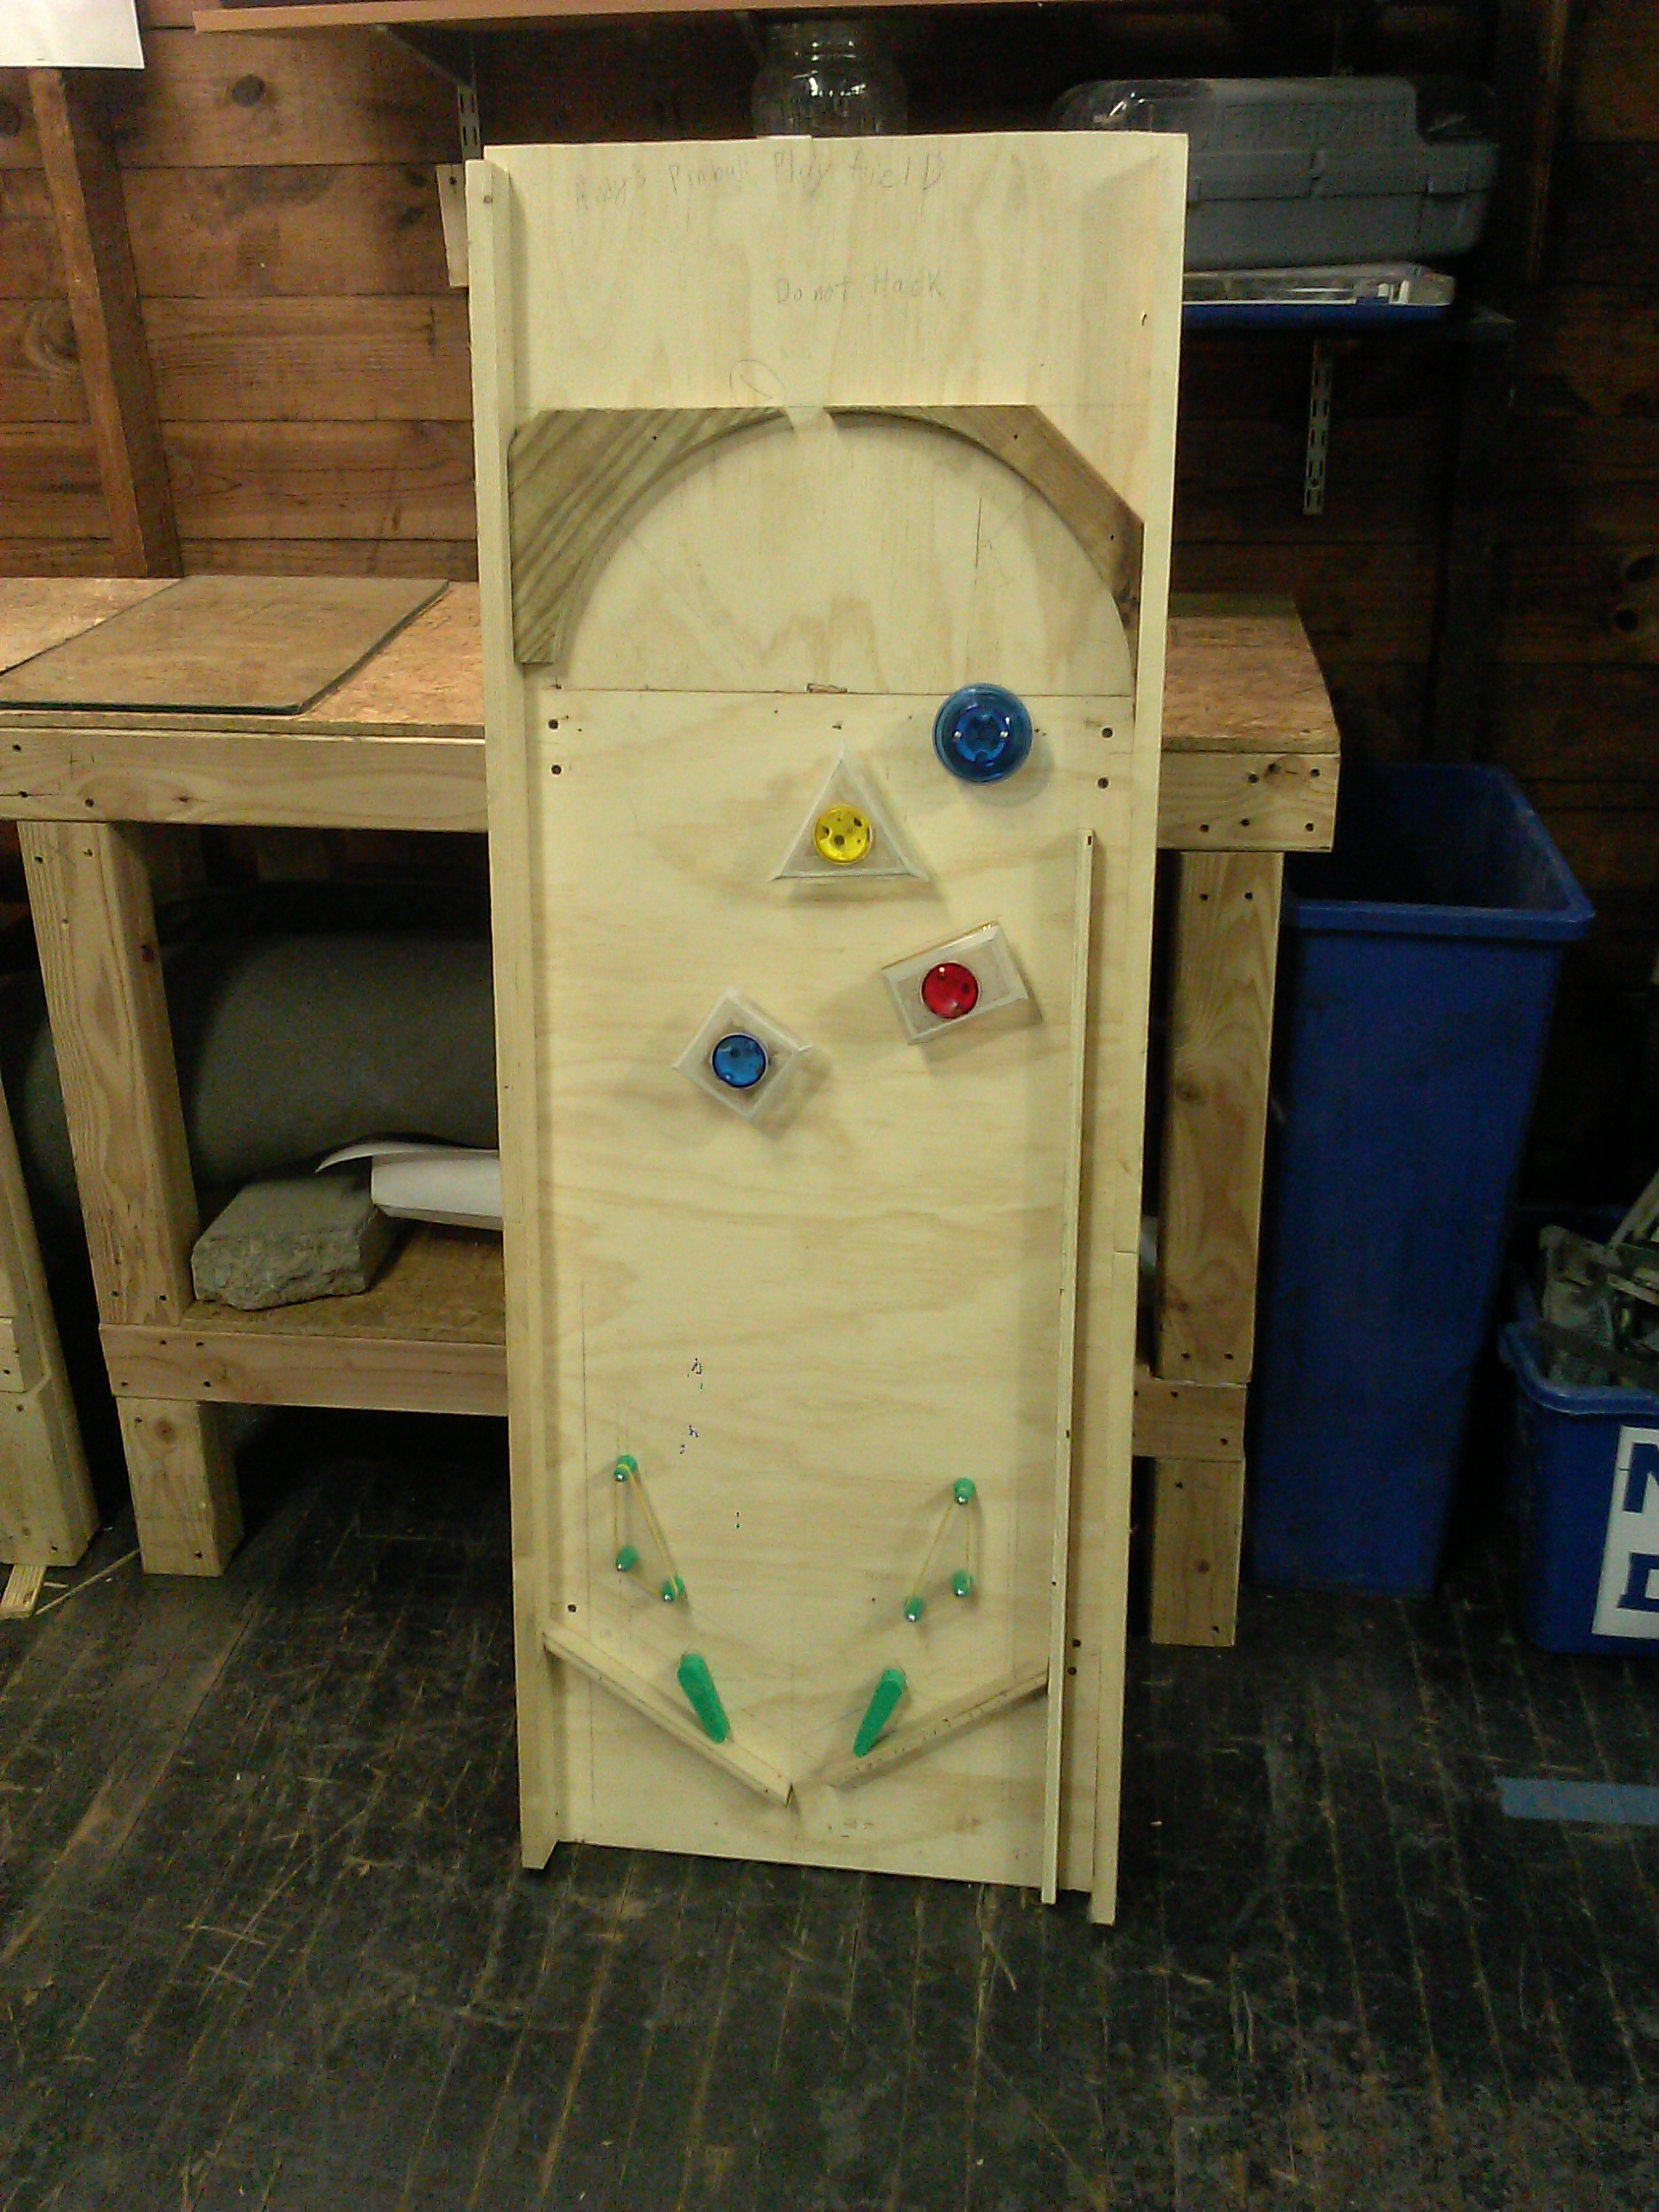
My friend and I found a scrap wood crate that we dismantled to re use the wood. So we started building a full size table for the pop bumpers. We layered all four of the different pop bumpers out on the table and moved them around till we found a pattern that looked good. With the pop bumpers mounted the mock up started to look like a pinball machine. |
|
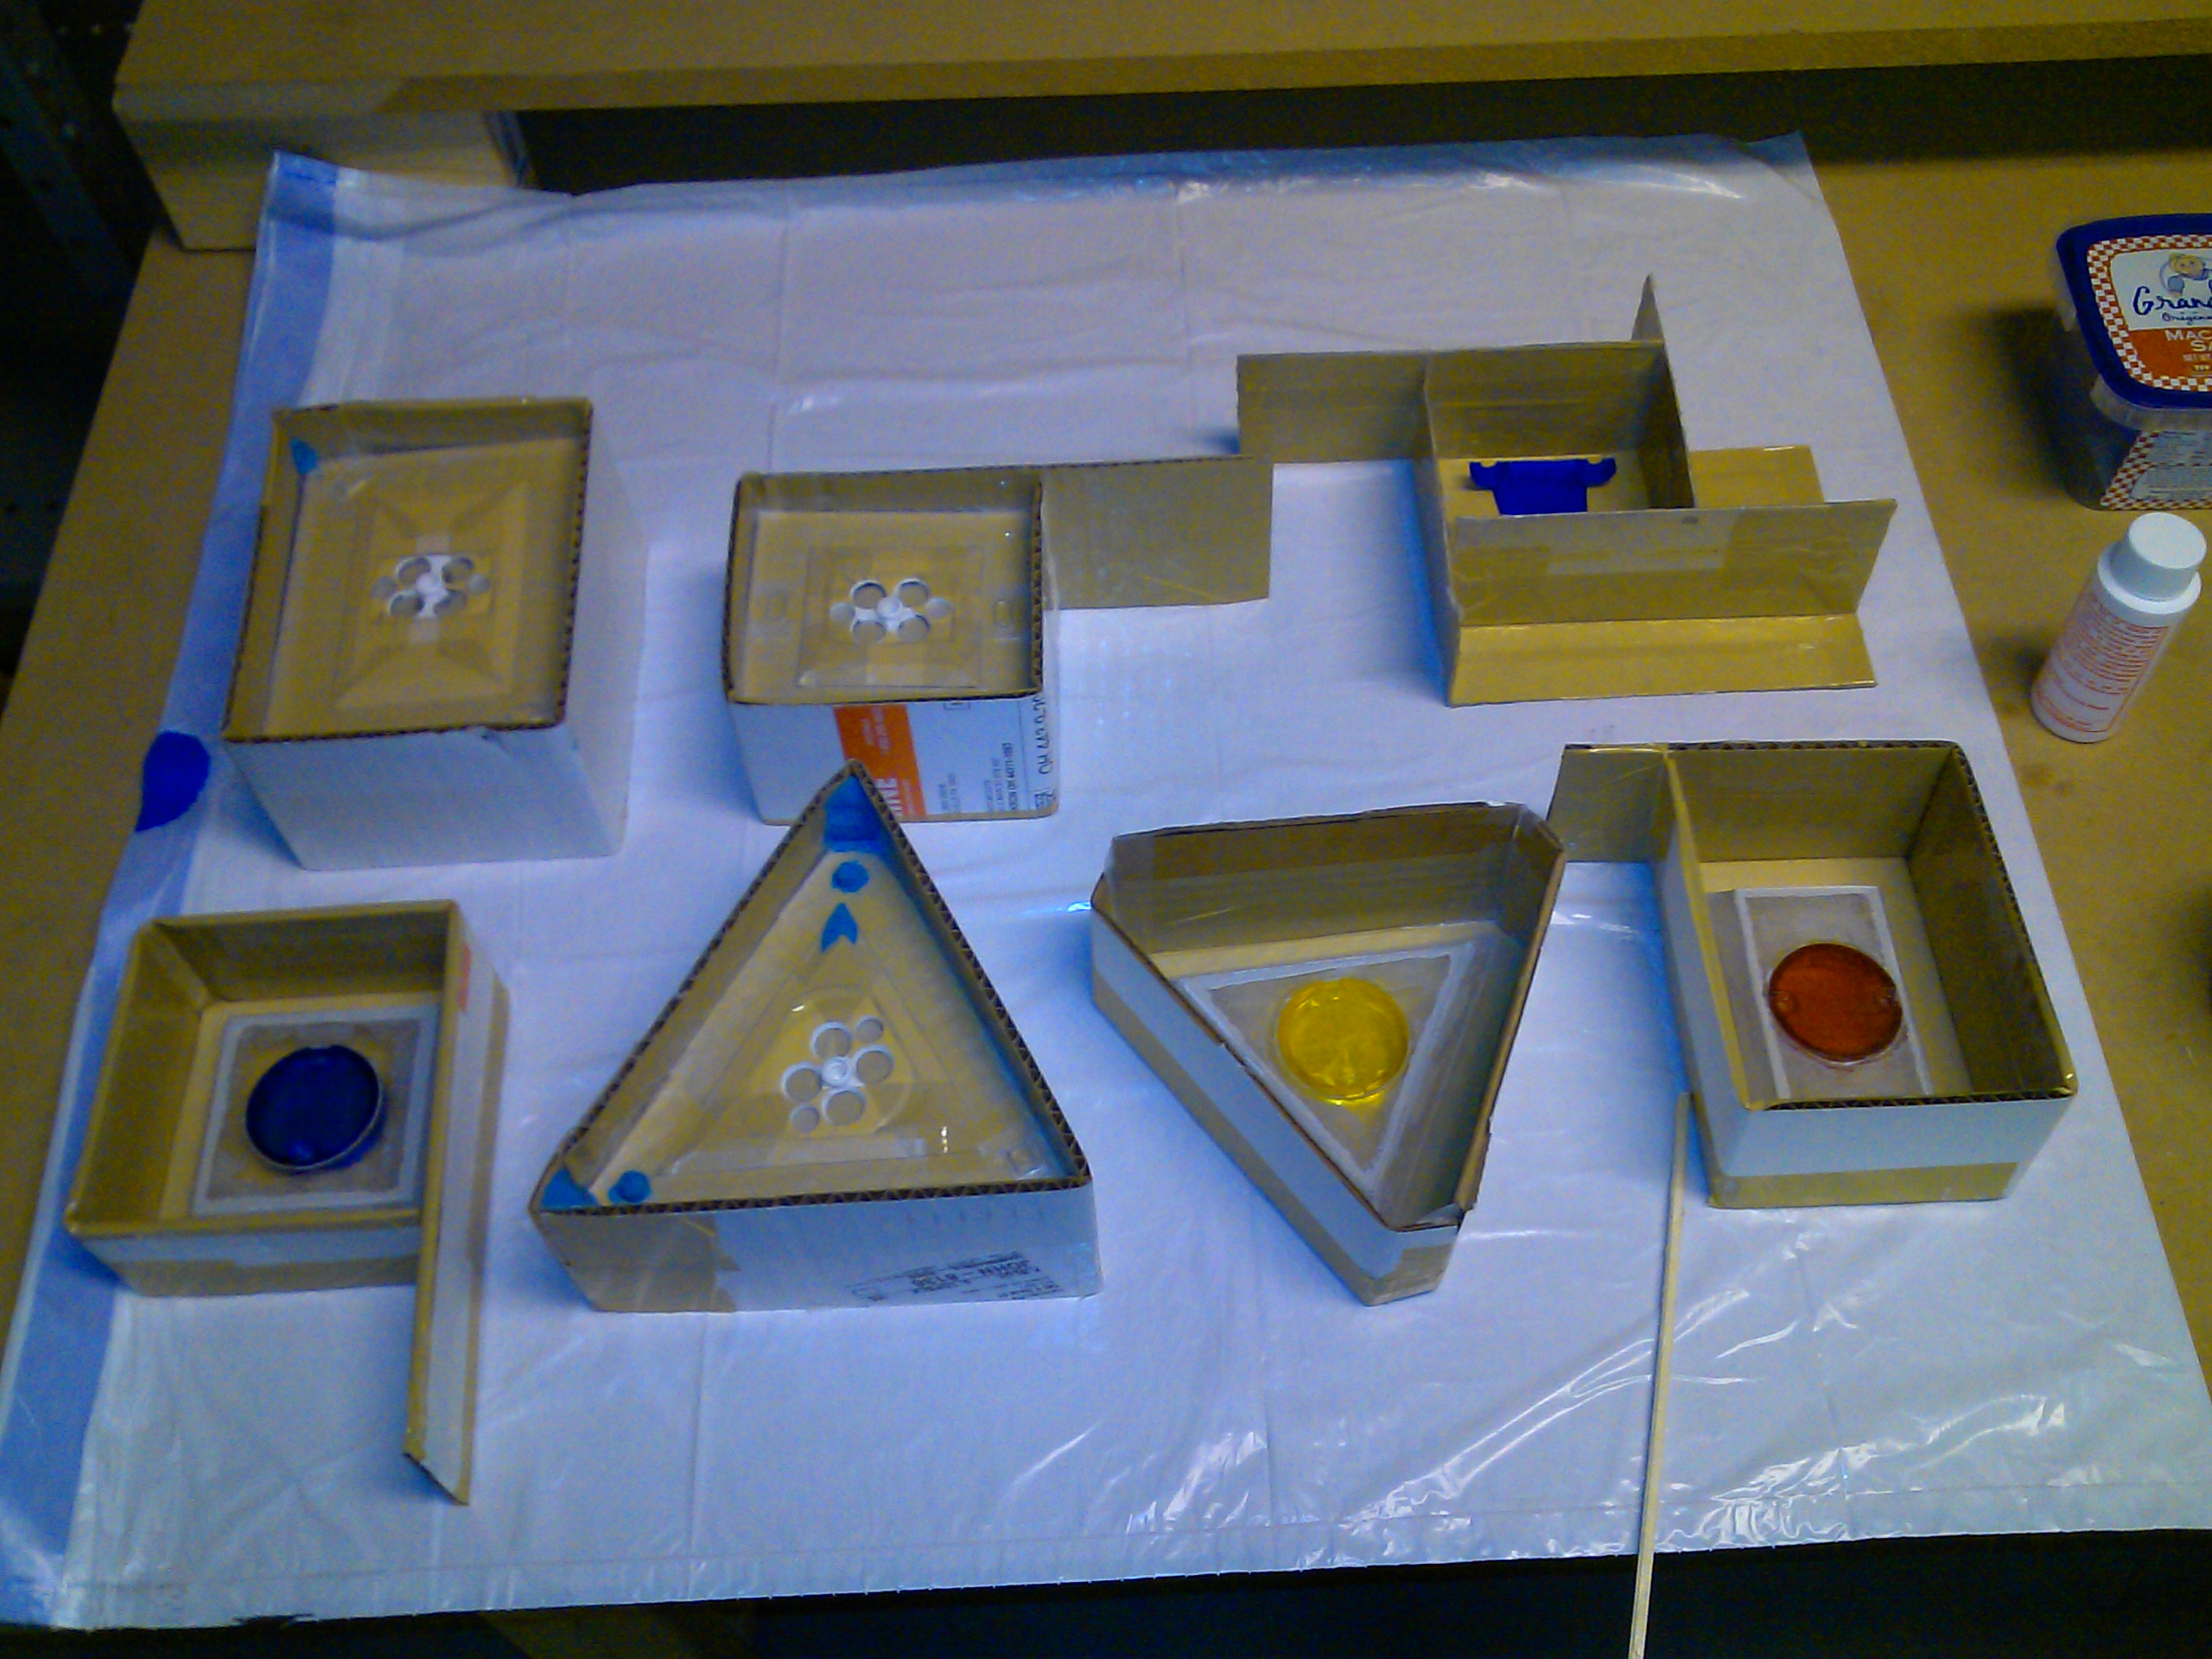
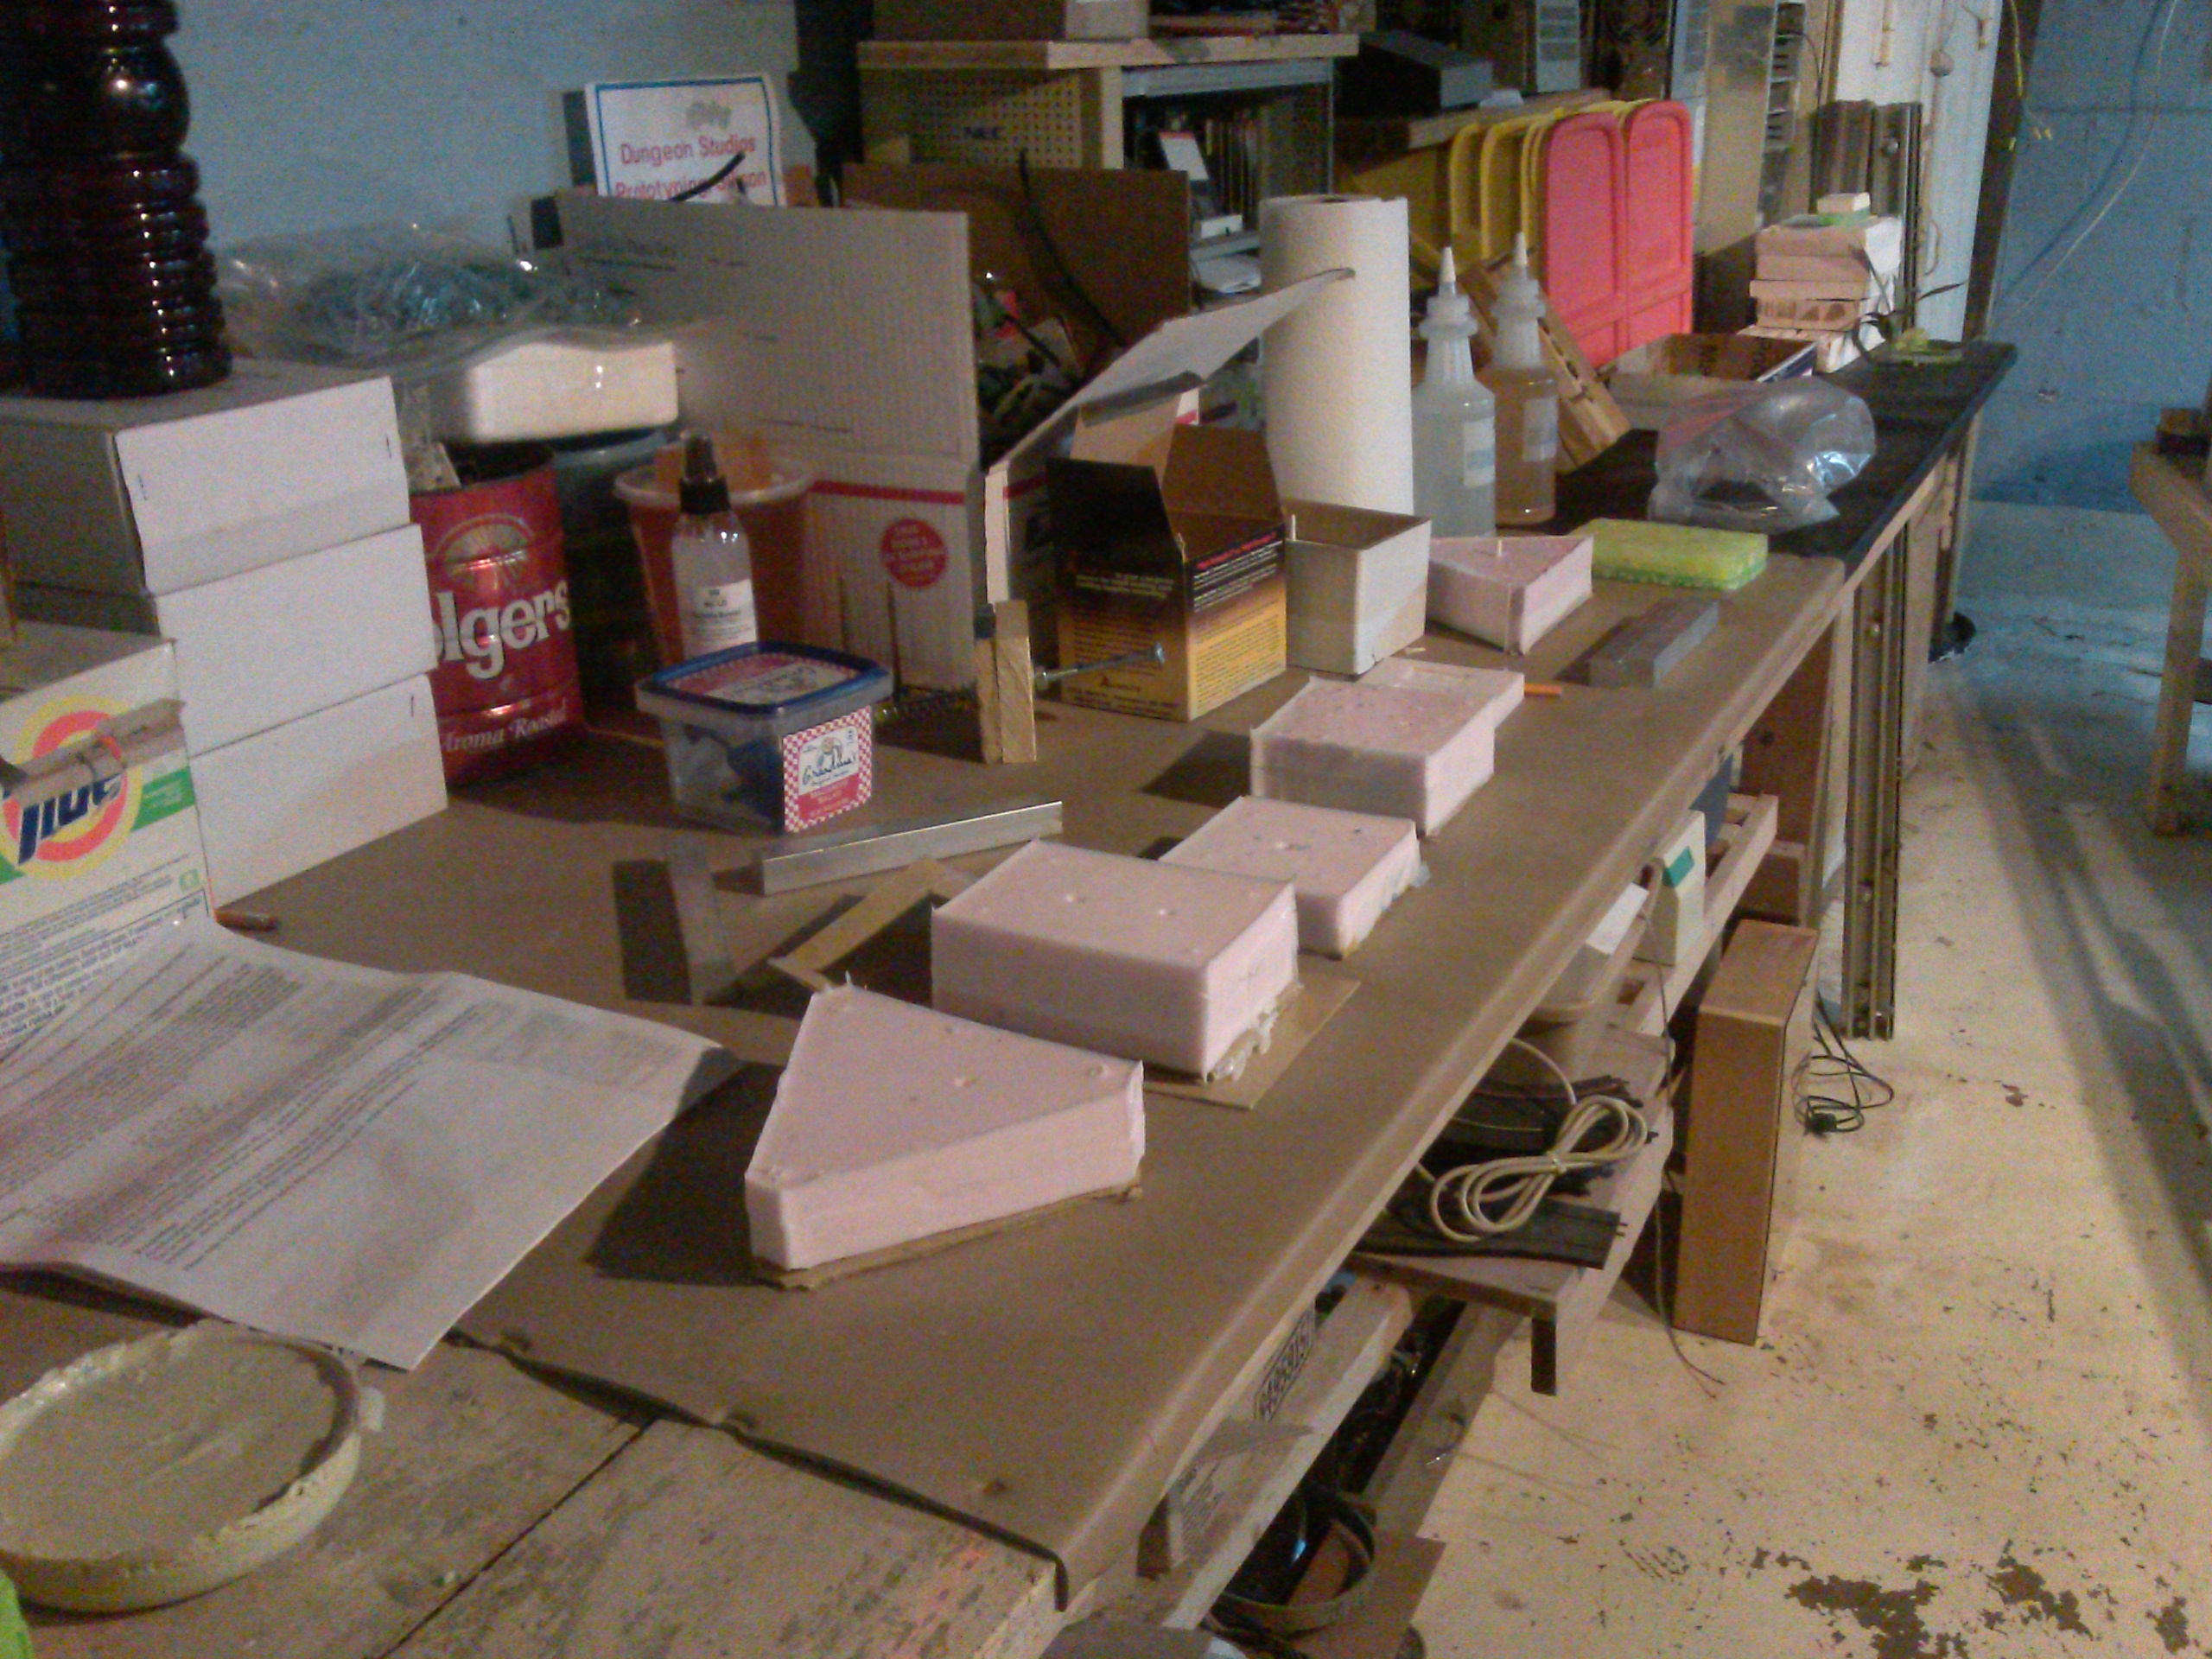
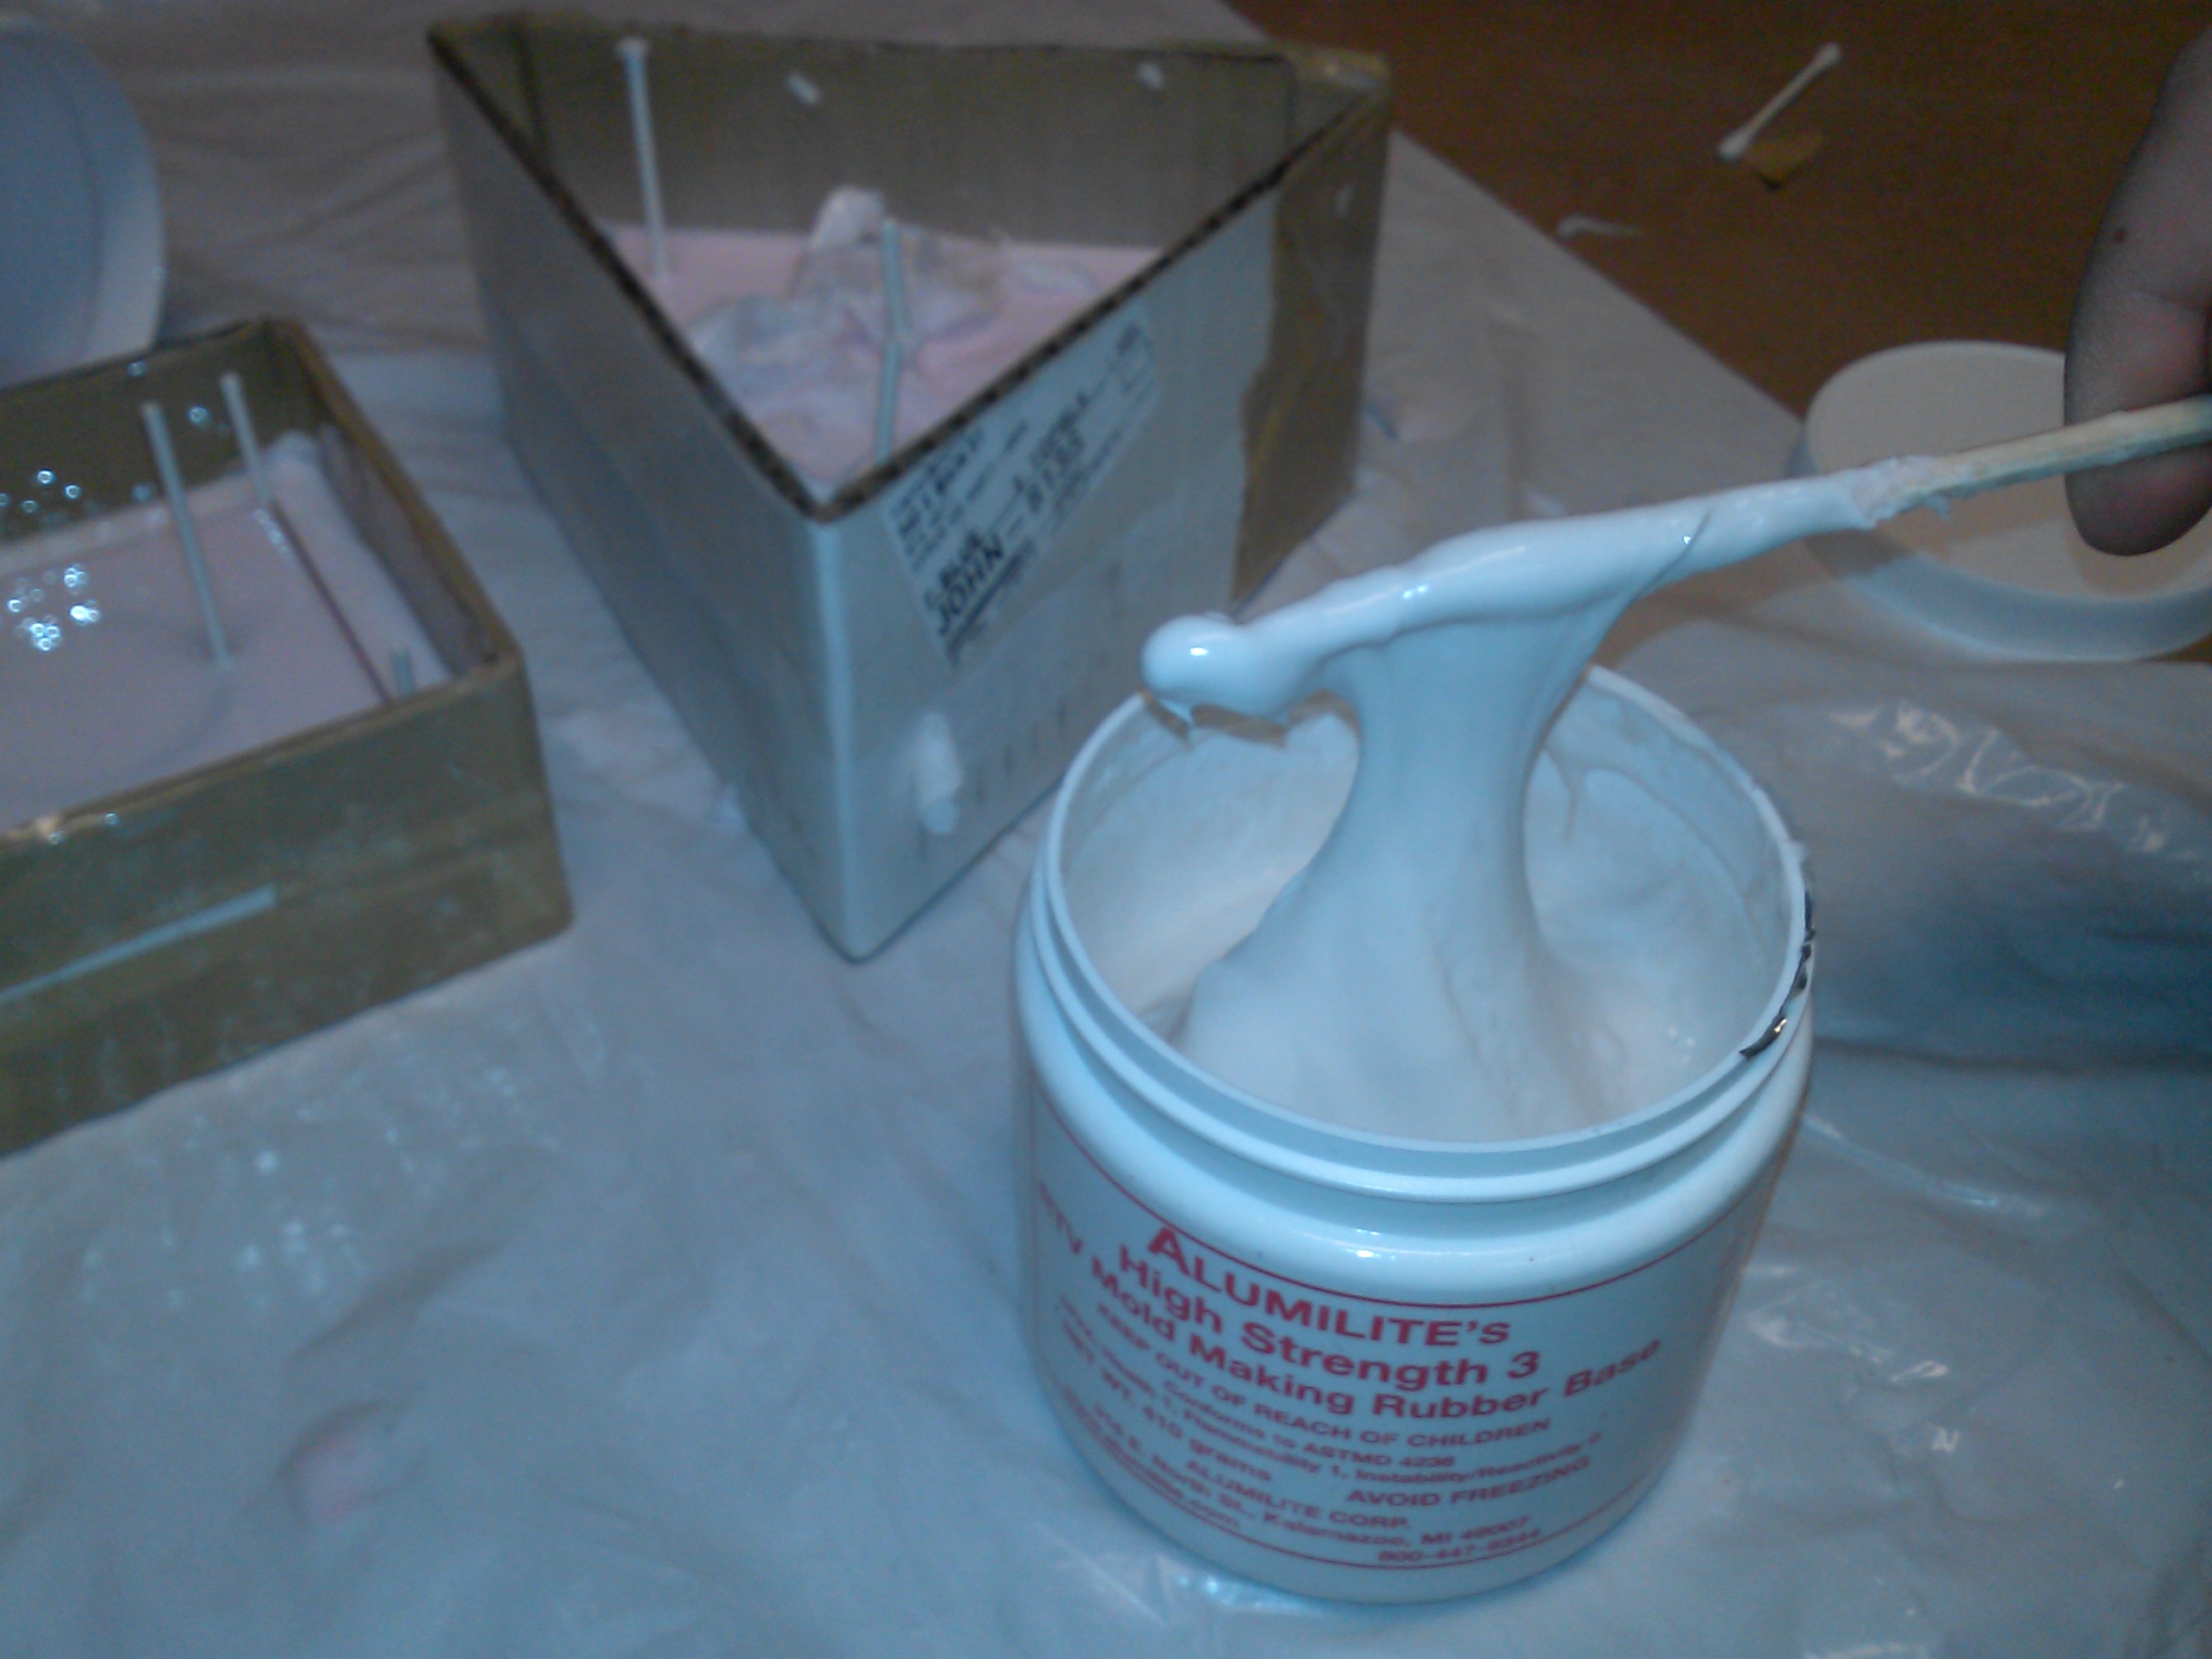
Here are the makings of the moulds, I start off with card board and tape. Lots of tape. The thought is to set everything up ahead of time so that when it comes time to poor, you don't have any worries. |
|
I went ahead a purchased a Raspberry Pi mini computer for the Pinball machine. My plan is to use this for generating the sound effects and maybe some visuals for the LCD screen. |
Here is the Raspbery Pi 
Click Here to buy |

Click Here to buy Audio Card Expansion Board for creating the sounds for the pinball machine. |

Click Here to buy This 16 Channel Relay Module will be for controlling the mechanical functions of the game. |
|
I ran into some issues with my moulding material getting all lumpy and hard to work with. I think this one batch was (new old stock) since the other molds came out just fine. |
|
custom, the rest of the parts are from a Balley's pop bumper. |
|
|
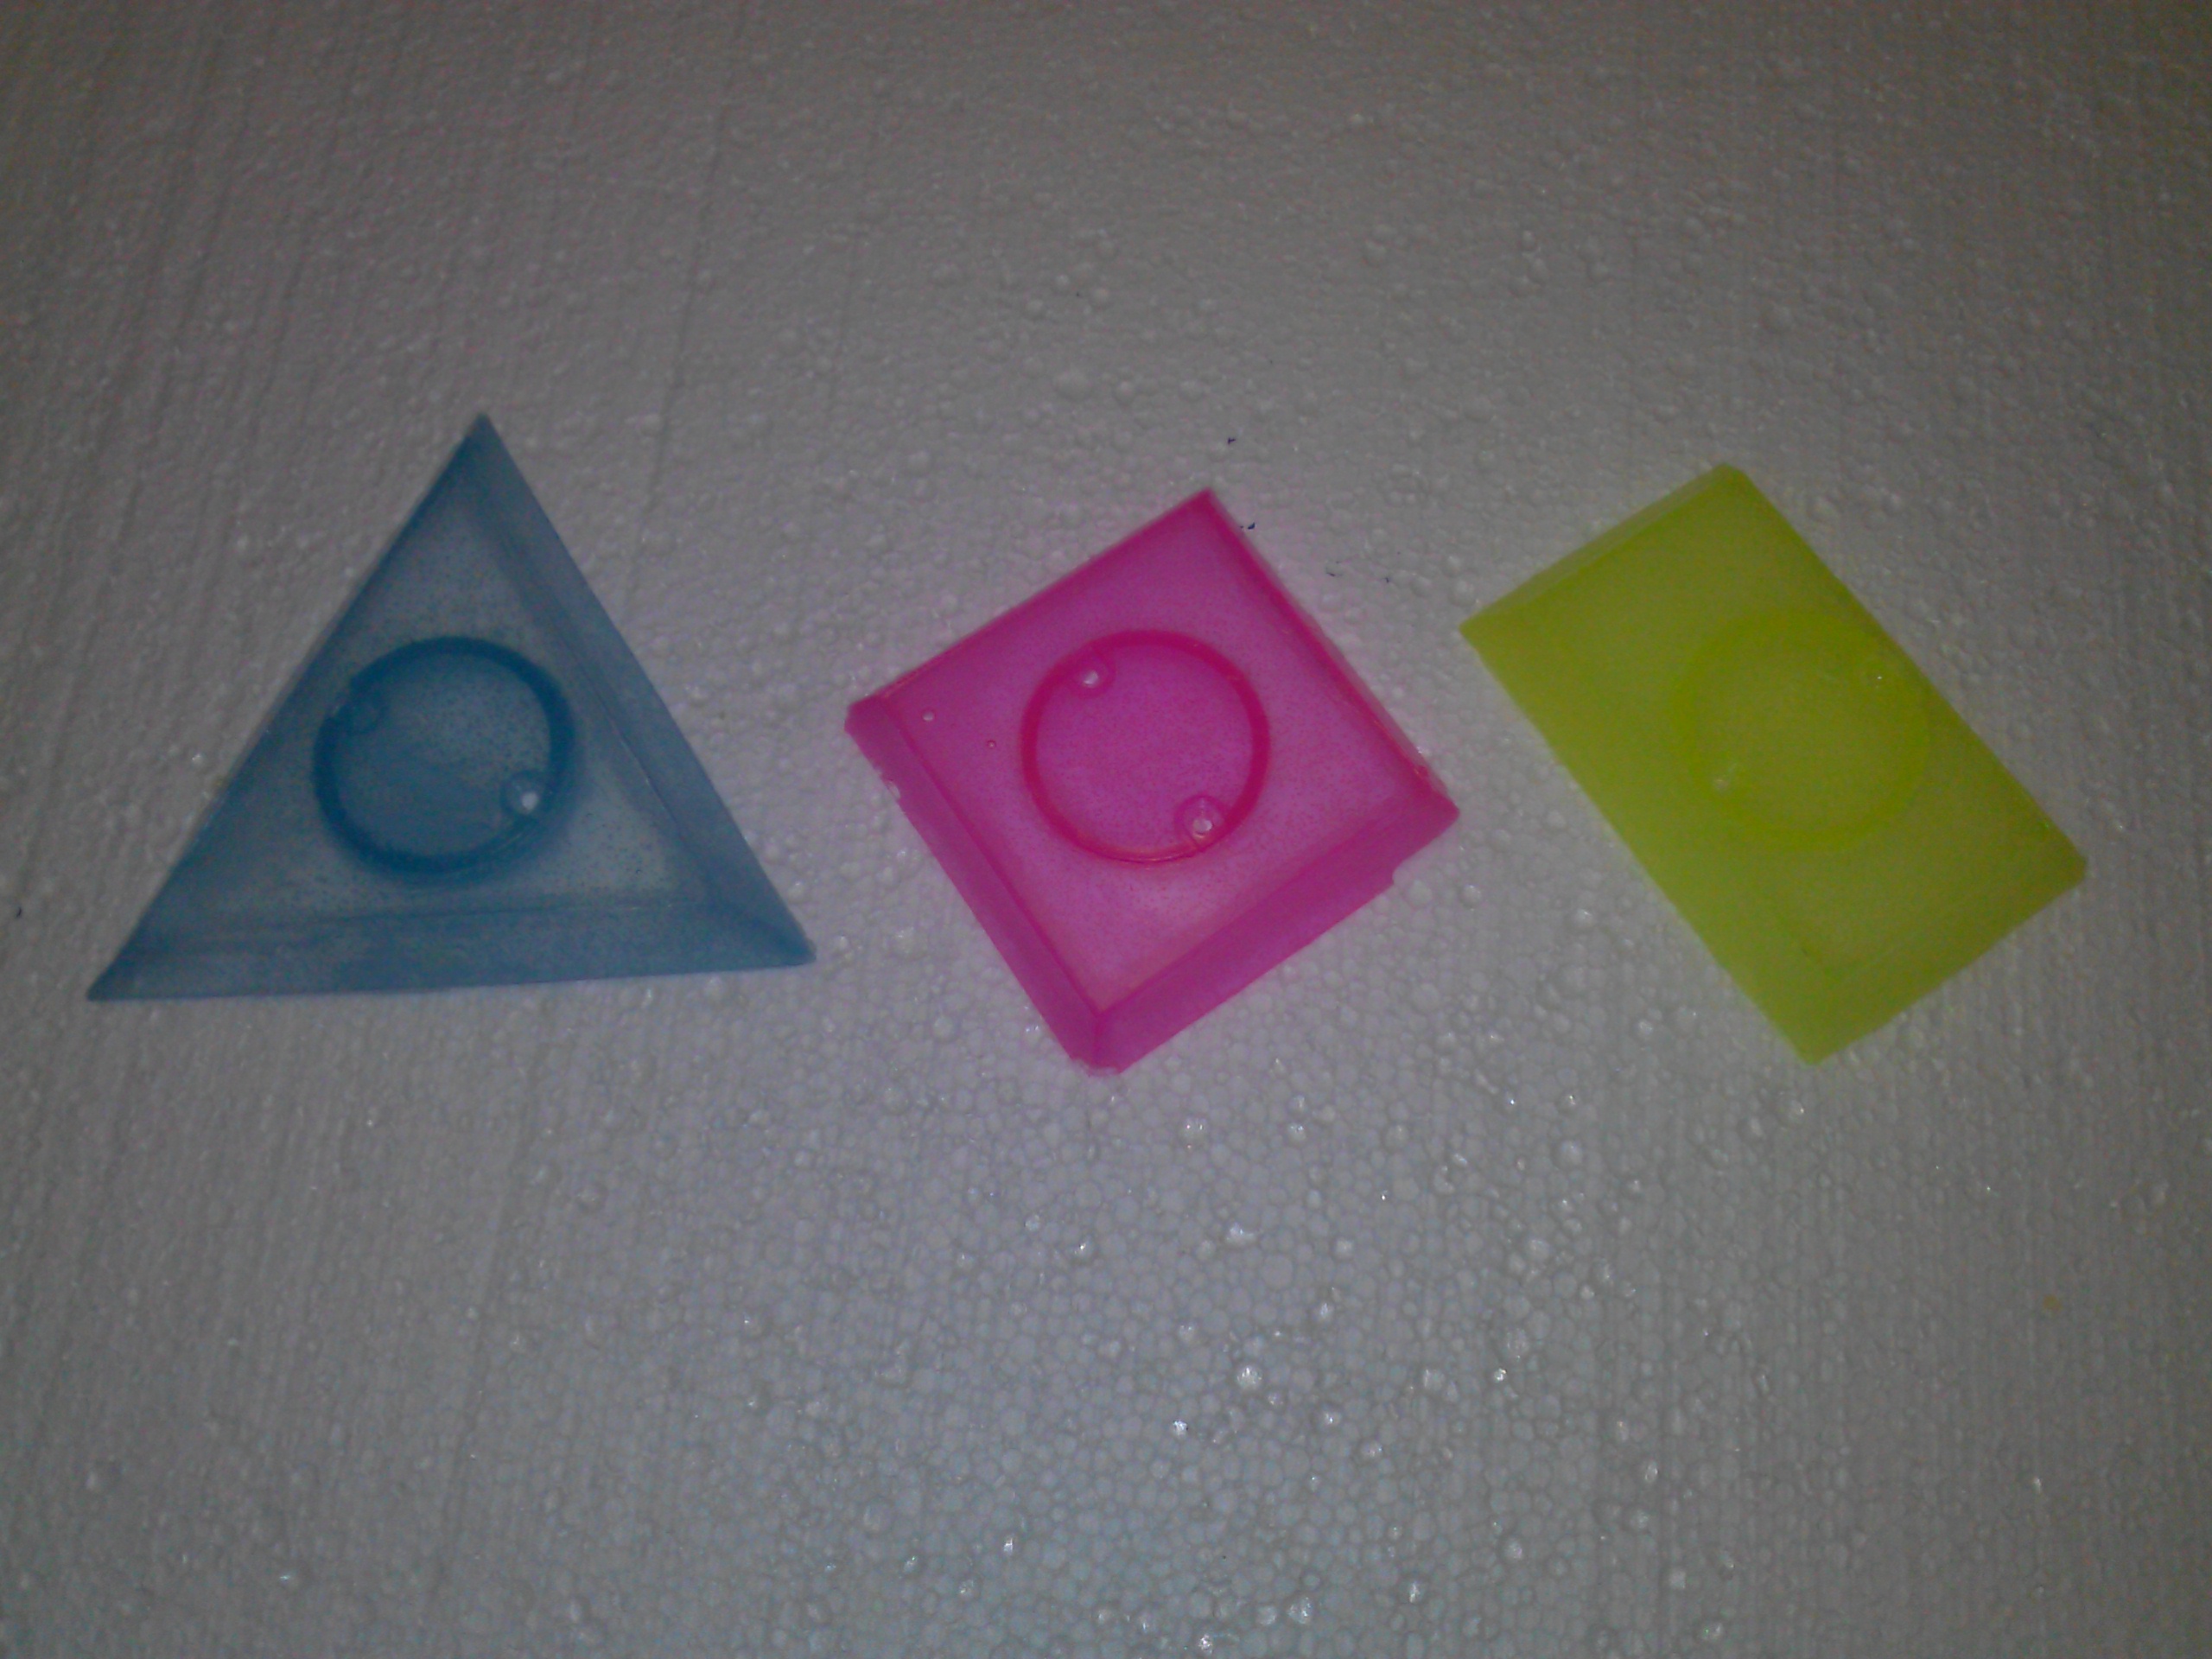
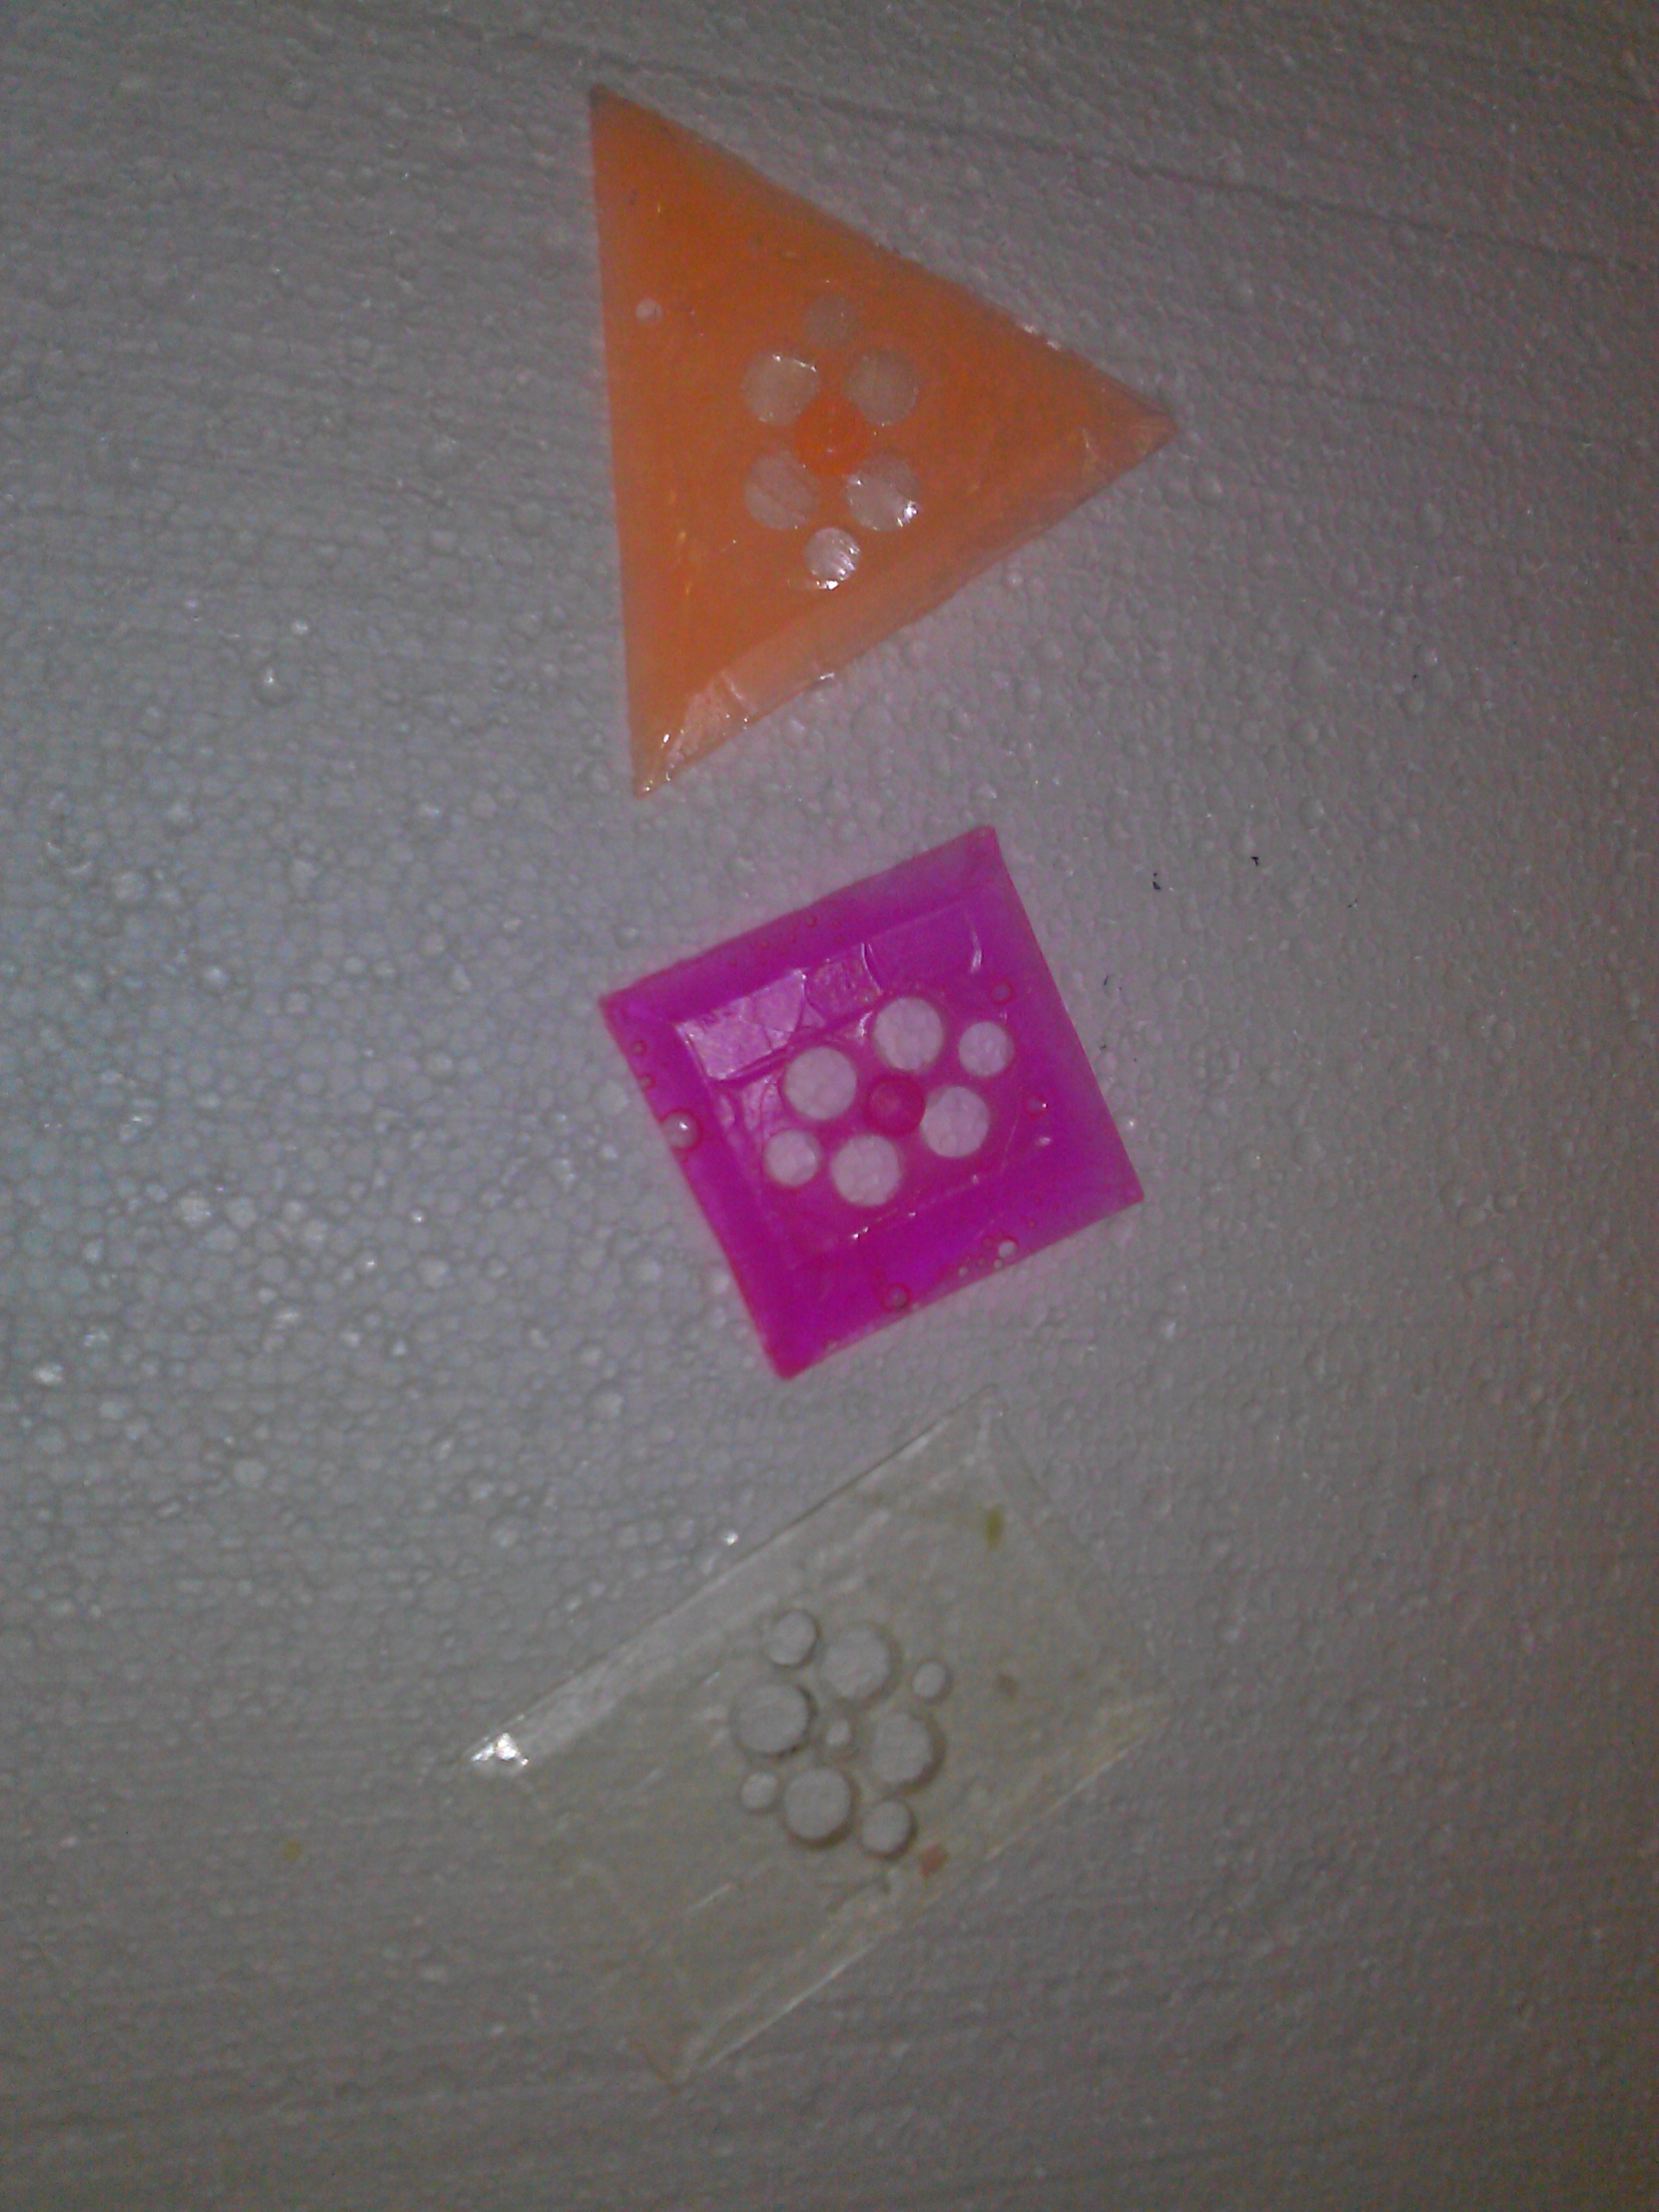
First we have the pop bumper Cap. The Cap's come in triangle, square and rectangle shapes. |
 |
|
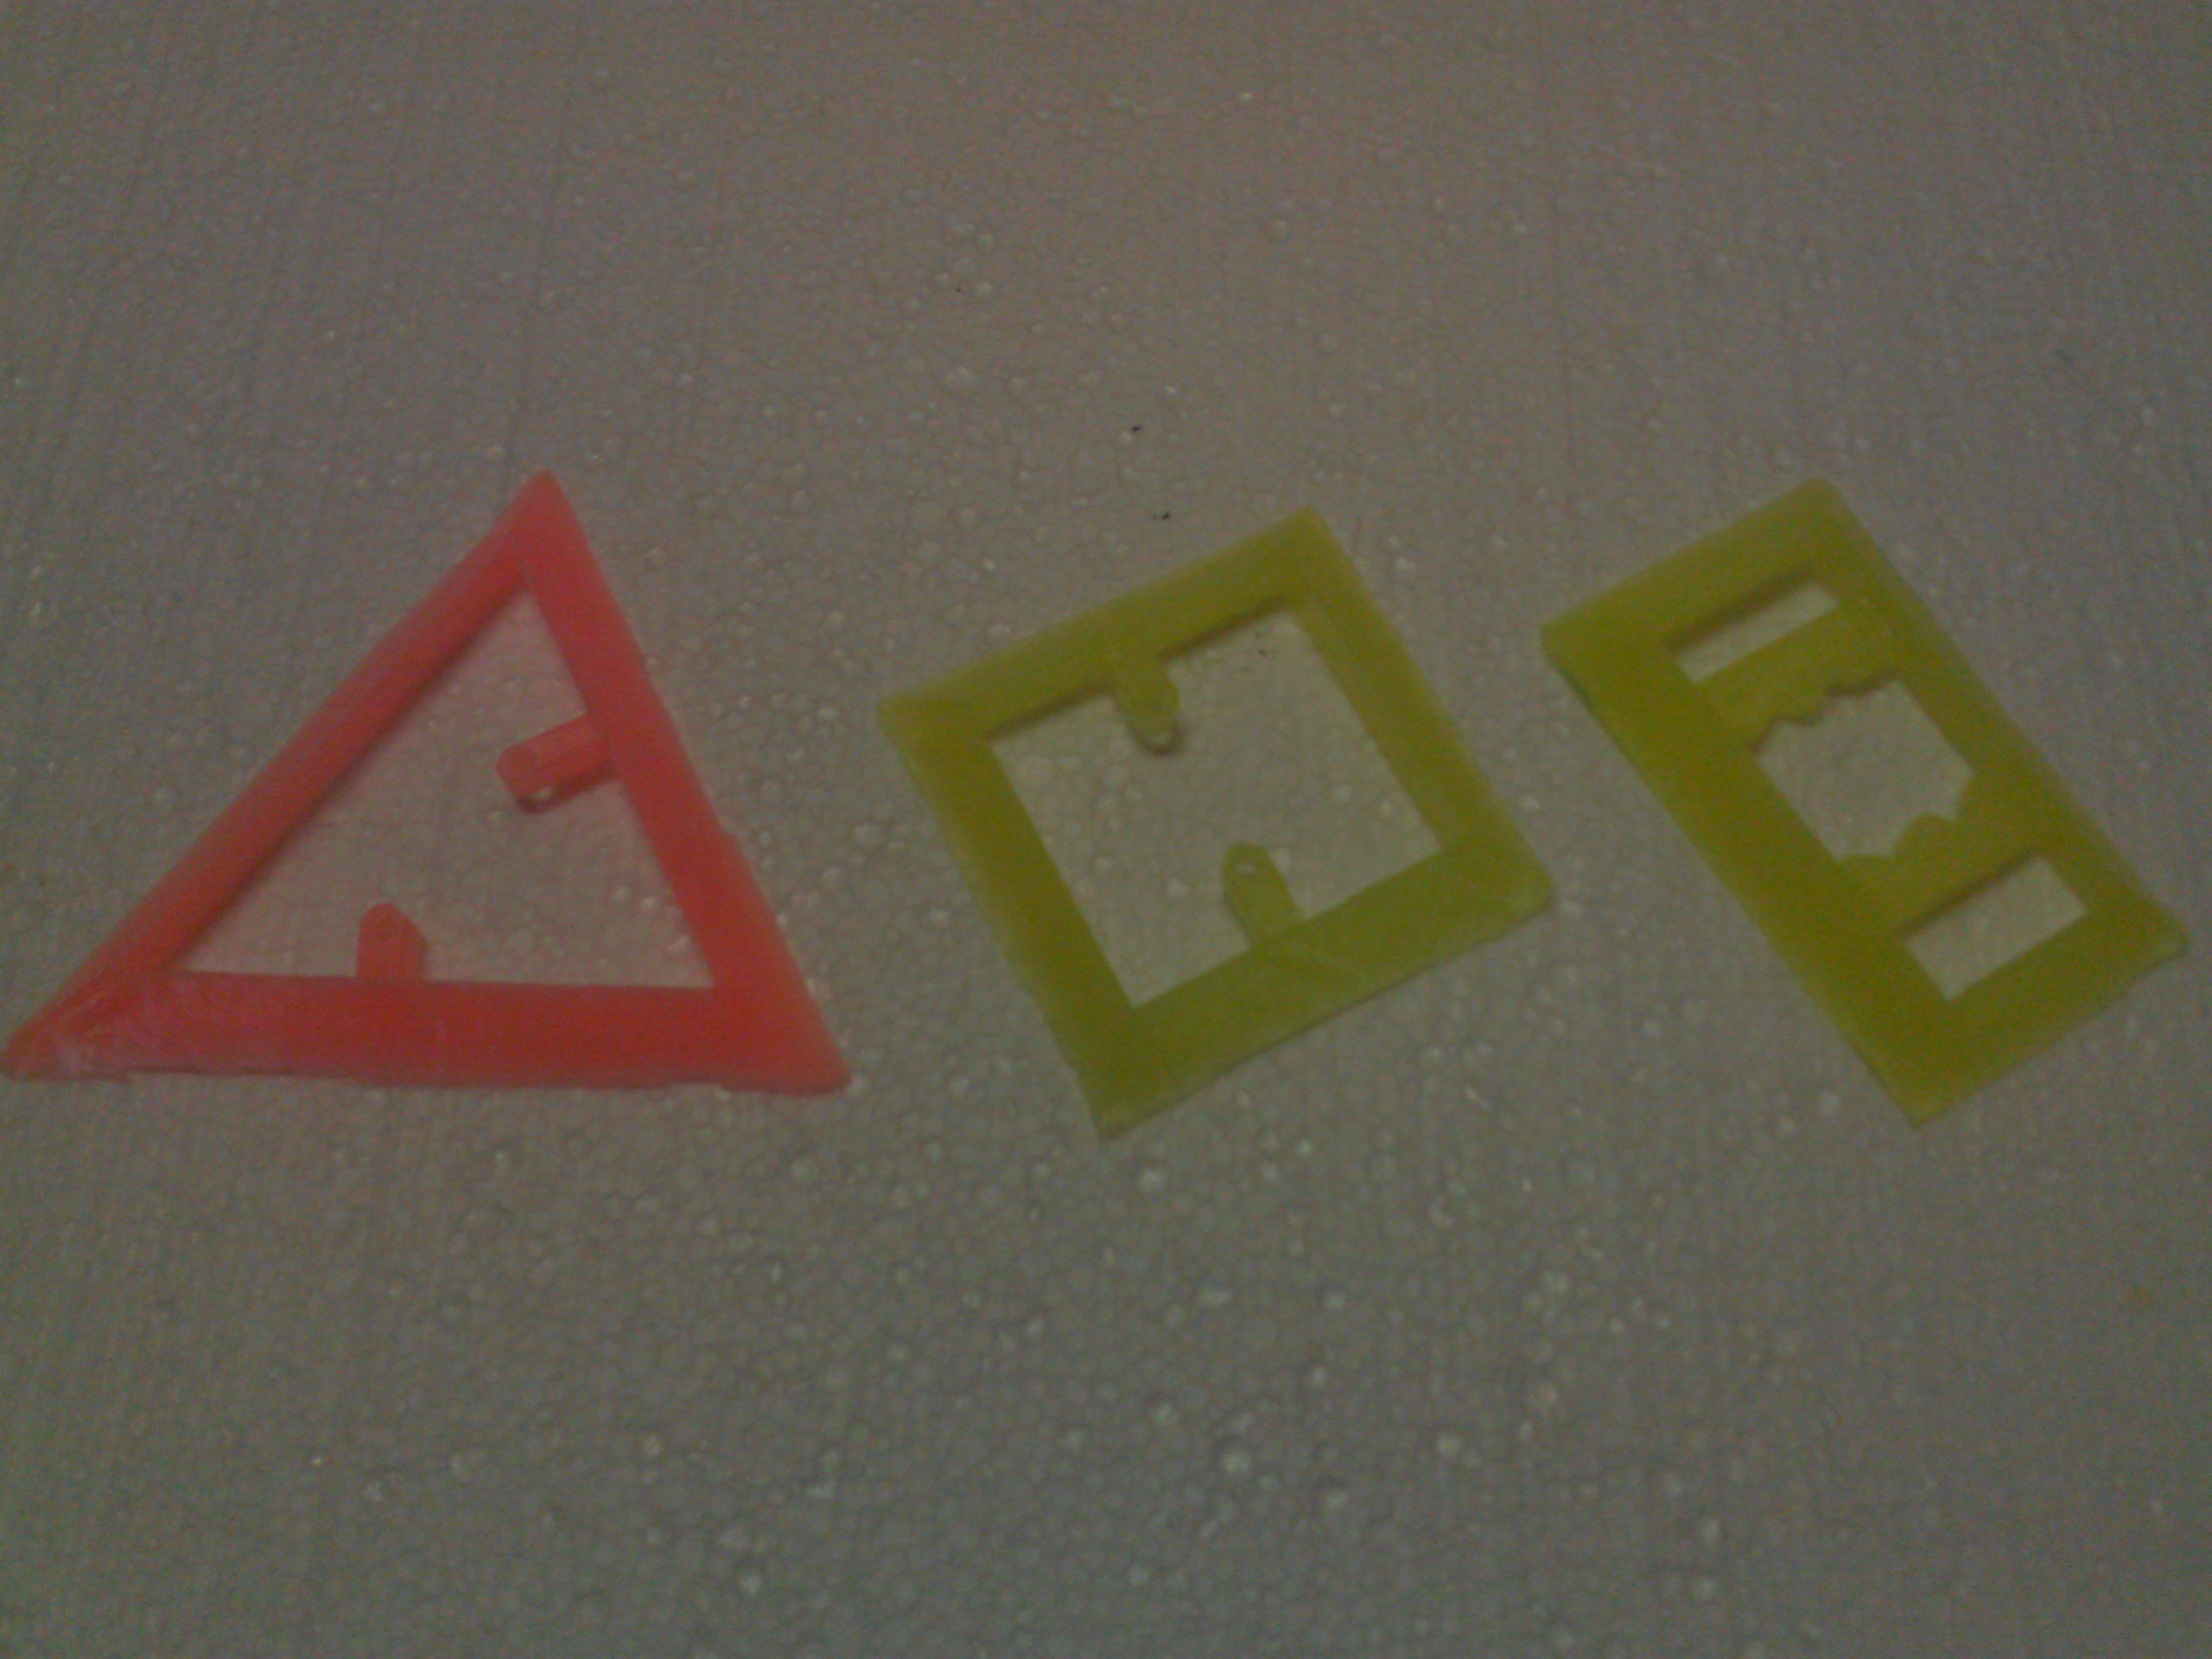
Next there is the Striker. The Strikers also come in triangle, square and rectangle shapes to match the Caps |
 |
|
Then we have the Skirts. Those also come in the three shapes as well. |
|
